MiBeeNvr: A Lightweight Home NVR System I Built
I have several cameras at home — a few Xiaomi cameras, some DIY ESP32 cameras, and multiple Raspberry Pi CSI cameras. I’d been using cloud storage solutions, but I was never comfortable with them: vendor lock-in, network dependency, and the costs add up. So I decided to build my own NVR system, called MiBeeNvr.
Why Build MiBeeNvr
To be honest, I was never satisfied with existing cloud storage solutions. Take Xiaomi cameras, for example. By default, you can only view them through the Mi Home app. Recordings are either stored on an SD card (limited capacity, frequent plugging/unplugging) or in the cloud. Cloud storage costs tens of dollars per month, and there’s the privacy concern — you never know when the manufacturer might use your video data for AI training or sell it to third parties. Not to mention vendor lock-in — switching platforms is nearly impossible.
ESP32 cameras have a similar problem. I built several ESP32 cameras, storing recordings on SD cards, but viewing and playback were inconvenient. I needed a unified management platform.
I also tried other open-source solutions: ZoneMinder requires a LAMP stack — installing and deploying it is more complex than my entire project; Shinobi’s configuration is a nightmare; and some smaller projects are basically unmaintained. Frigate is nice but primarily focused on AI detection and depends on Docker — too heavy.
In short, I wanted something that is:
- A single binary file — download and run
- Lightweight enough to run on a Raspberry Pi
- Supports multiple camera types, especially Xiaomi’s proprietary protocol
- Clean Web interface without frontend complexity
- Auto-cleanup of old recordings, won’t fill up the disk
After searching around, none of the existing solutions fit. So I wrote my own.
What is MiBeeNvr
MiBeeNvr is a lightweight NVR system written in Go, designed to solve local storage for home cameras.
Overall Architecture
Here’s a global architecture diagram showing the whole system:
graph TB
    subgraph Camera End
        CAM1@{shape: hex, label: "📷 Xiaomi Camera<br/>miss protocol"}
        CAM2@{shape: hex, label: "📷 ESP32 Camera<br/>HTTP JPEG"}
        CAM3@{shape: hex, label: "📷 Raspberry Pi CSI<br/>RTSP H.264"}
    end

    subgraph Protocol Bridge
        G2RTC["go2rtc<br/>miss → RTSP"]
        MTX["MediaMTX<br/>CSI → RTSP"]
    end

    subgraph MiBeeNvr
        direction TB
        API["REST API"] --> REC["Recording Engine"]
        REC --> STORE@{shape: cyl, label: "SQLite Storage"}
        STORE --> CLEAN["Auto Cleanup"]
        API --> HLS["HLS Live"]
    end

    subgraph Access Methods
        direction TB
        WEB["Web UI"]
        WEBDAV["WebDAV / FTP"]
        PROM["Prometheus"]
    end

    CAM1 -->|"miss"| G2RTC -->|"RTSP"| API
    CAM2 -->|"HTTP"| API
    CAM3 -->|"RTSP"| MTX -->|"RTSP"| API
    API --> WEB
    API --> WEBDAV
    API --> PROM

    classDef hardware fill:#e3f2fd,stroke:#1976d2,stroke-width:2px
    classDef process fill:#e8f5e9,stroke:#4caf50,stroke-width:2px
    classDef core fill:#fff3e0,stroke:#ff9800,stroke-width:2px
    classDef network fill:#f3e5f5,stroke:#9c27b0,stroke-width:2px
    class CAM1,CAM2,CAM3 hardware
    class G2RTC,MTX process
    class API,REC,STORE,CLEAN,HLS core
    class WEB,WEBDAV,PROM network
Three layers: the camera end handles capture, a protocol bridge layer handles proprietary protocols, MiBeeNvr core handles recording and storage, and various access methods sit on top.
Recording Pipeline
The processing flow after video streams enter MiBeeNvr:
flowchart LR
    subgraph Input
        RTSP["RTSP Connection<br/>gortsplib"]
        HTTP["HTTP JPEG<br/>Periodic frame grab"]
    end

    subgraph Decode_Mux
        RTP["RTP Depacket<br/>pion/rtp"]
        MP4["MP4 Mux<br/>go-mp4"]
    end

    subgraph Storage
        SEG["Segment Files<br/>30s / 10m"]
        DB@{shape: cyl, label: "SQLite Metadata"}
        DISK@{shape: hex, label: "Disk"}
    end

    RTSP --> RTP --> MP4
    HTTP --> MP4
    MP4 --> SEG --> DISK
    MP4 --> DB

    classDef input fill:#e3f2fd,stroke:#1976d2,stroke-width:2px
    classDef process fill:#e8f5e9,stroke:#4caf50,stroke-width:2px
    classDef storage fill:#fff3e0,stroke:#ff9800,stroke-width:2px
    class RTSP,HTTP input
    class RTP,MP4 process
    class SEG,DB,DISK storage
In short: RTSP → RTP depacket → MP4 mux → segmented storage. The frontend uses Svelte 5 — the entire SPA is compiled to static assets and embedded into the Go binary, so deployment only needs a single file, no need for a separate Web server.
Backend tech stack:
- Go 1.26 + modernc.org/sqlite (pure Go, no CGO dependency)
- chi routing library, clean and efficient
- gortsplib for RTSP/RTP protocol
- pion/rtp for real-time streaming
SQLite was chosen because it’s single-file, pure Go, performs well enough for home use, supports concurrent access, and most importantly, doesn’t require a separate database installation.
Design Philosophy
The entire project’s design philosophy is “simple and straightforward”:
- Single binary file, no external dependencies
- Supports cross-compilation, runs on AMD64/ARM64
- YAML configuration, intuitive
- Built-in Web interface, open browser to use
- Minimal resource usage, runs smoothly on Raspberry Pi 4
Key Features
- Supports multiple camera protocols: RTSP (H.264/H.265), HTTP JPEG
- Built-in Web interface with dark/light theme switching
- Chinese/English bilingual support
- WebDAV (read-write), FTP, REST API
- MQTT-triggered recording, ideal for smart home integration
- Prometheus monitoring metrics
- Per-camera independent retention policies
- MP4 segmented recording, auto-cleanup of old files
- Supports HLS live streaming (up to 4 concurrent)
My Actual Deployment
I run it on an ARM64 mini host with 512MB RAM and 2GB storage. The system runs very stably — basically set it and forget it.
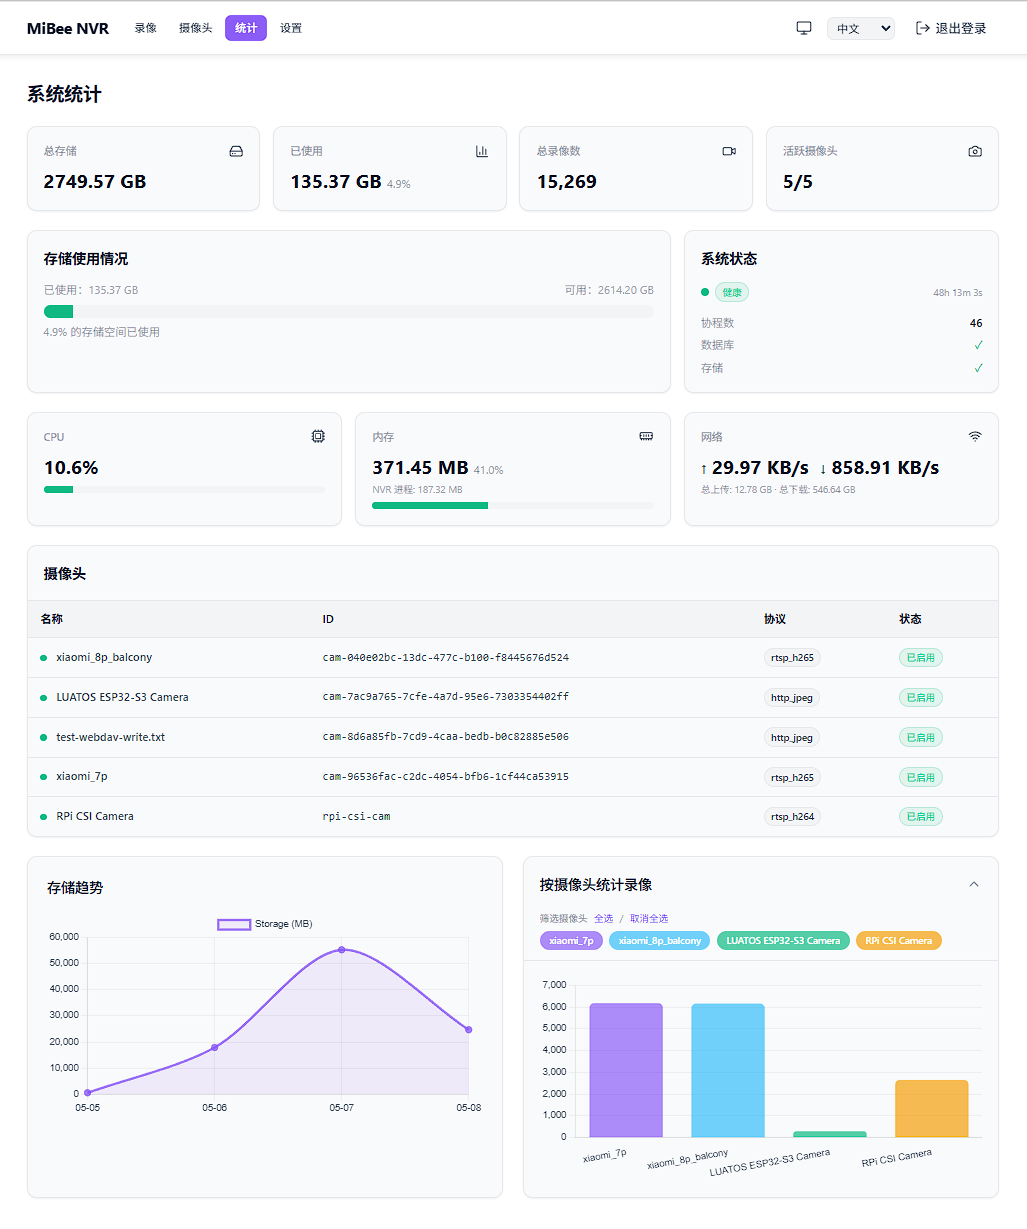
Connected 4 cameras, each with its own characteristics:
- Raspberry Pi CSI Camera — RTSP bridge via MediaMTX, converting CSI interface video to standard RTSP. Configured as
rtsp_h264. - ESP32-S3 Camera — DIY, running MJPEG stream via HTTP protocol. Configured as
http_jpeg. - Xiaomi Camera (Balcony) — Protocol conversion via go2rtc (Xiaomi proprietary → RTSP), 2K resolution, configured as
rtsp_h265. - Xiaomi Camera (Living Room) — Same as above, 1080P.
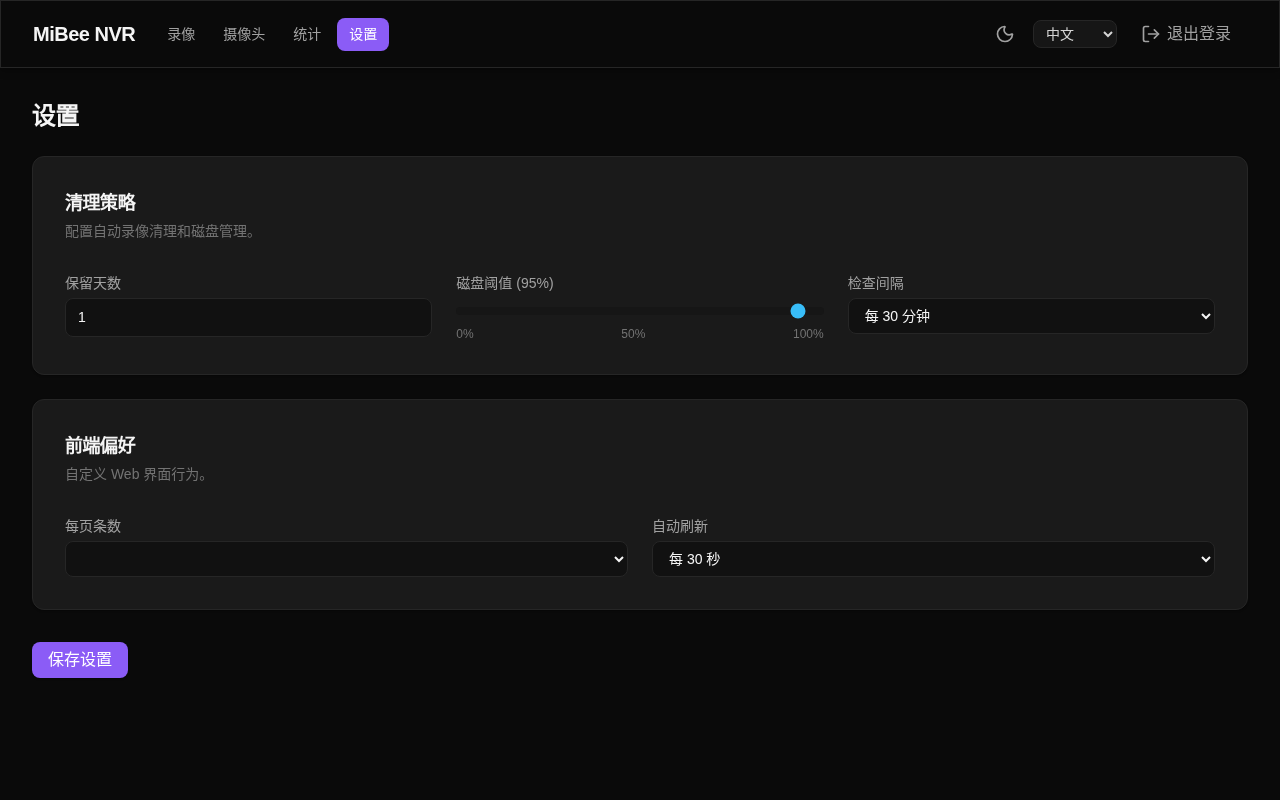
Configuration is 30-second segment recording with 1-day retention. This interval is a trade-off: too short creates too many files, too long makes it inconvenient to look up incidents. WebDAV (read-write) and FTP are enabled for convenient phone viewing and backup.
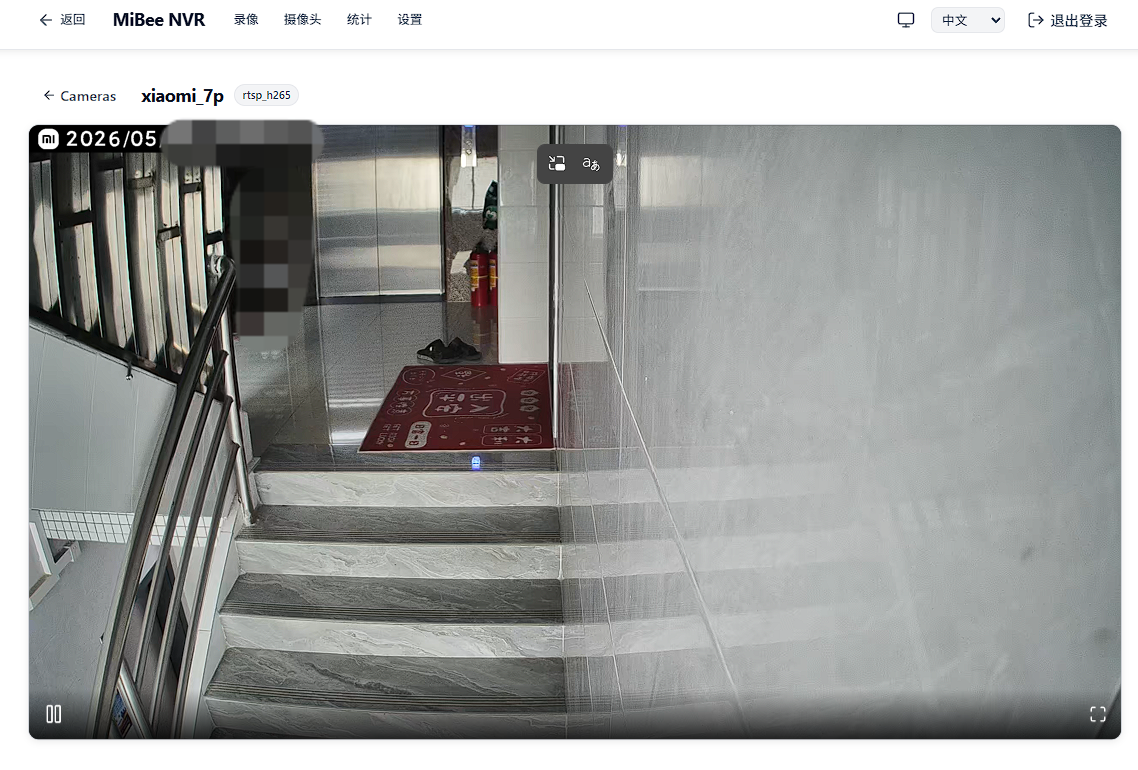
The Web interface is clean — camera management and recording lists are straightforward.
Settings page:
Configuration File
The complete configuration file looks like this — YAML format, clear at a glance:
| |
Xiaomi Camera Integration
Xiaomi camera protocol is a major headache. It uses its proprietary “miss” (Mi Secure Streaming) protocol with multi-layer encryption, without a standard RTSP interface. Even if you know the camera’s IP, you can’t pull a stream with VLC.
Fortunately, there’s go2rtc, a lifesaver. The integration chain looks like this:
sequenceDiagram
    participant APP as Mi Home App
    participant CLOUD as Xiaomi Cloud
    participant CAM as Xiaomi Camera
    participant G2 as go2rtc
    participant NVR as MiBeeNvr

    Note over G2,CLOUD: 1. Account auth & key exchange
    G2->>CLOUD: Login with Xiaomi account
    CLOUD-->>G2: Return device list & encryption keys

    Note over G2,CAM: 2. Establish P2P connection
    G2->>CAM: Initiate miss protocol handshake
    CAM-->>G2: P2P connection established

    Note over G2,NVR: 3. Video stream relay
    loop Continuous recording
        CAM->>G2: miss encrypted video stream
        G2->>G2: Decrypt & transcode
        G2->>NVR: Standard RTSP stream (H.265)
        NVR->>NVR: MP4 segmented recording
    end

    Note over APP,NVR: 4. No longer dependent on Mi Home App
    NVR->>NVR: Web UI / WebDAV / FTP view recordings
The entire process requires no firmware flashing, no camera disassembly, and no Xiaomi cloud storage subscription. go2rtc handles all the protocol conversion.
go2rtc Deployment
The easiest way to deploy go2rtc is with Docker:
| |
Key points:
- The
xiaomi://protocol requires Xiaomi account and password authentication didis the device’s unique identifier,modelis the device model (can be found in the Mi Home app)- go2rtc automatically handles P2P connection and miss protocol decryption
- The final standard RTSP stream is exposed on port 8554, and MiBeeNvr connects to it like any normal camera
Then point to go2rtc in MiBeeNvr’s config:
| |
Pitfalls Encountered
Xiaomi camera integration has several pitfalls:
- First-time network connection: Xiaomi cameras must be able to reach the internet for key exchange with Xiaomi servers. After connection is established, subsequent transmission is over LAN.
- Device ID acquisition: Each camera’s
didis unique. Use go2rtc’s WebUI (port 1984) for auto-discovery, or dig through the Mi Home app. - Not all models are supported: go2rtc maintains a compatibility list — check before buying a camera.
- H.265 vs H.264: Newer Xiaomi cameras mostly use H.265. MiBeeNvr supports both codecs, but H.265 saves storage space.
ESP32 Camera Projects
While working on MiBeeNvr, I also built several ESP32 camera firmware projects. ESP32 cameras had their share of pitfalls, but were also quite interesting.
Three firmware projects with different positioning:
graph LR
    subgraph ESP32 Camera Firmware
        A@{shape: doc, label: "MiBeeCam<br/>ESP32-S3-A10<br/>Best for beginners"}
        B@{shape: doc, label: "AI Thinker CAM<br/>ESP32-CAM<br/>Best value"}
        C@{shape: doc, label: "MiBeeHomeCam<br/>XIAO ESP32-S3<br/>Most features"}
    end

    subgraph NVR Unified Management
        NVR@{shape: cyl, label: "MiBeeNvr"}
    end

    A -->|"HTTP JPEG"| NVR
    B -->|"HTTP JPEG / WebDAV"| NVR
    C -->|"HTTP JPEG / FTP"| NVR

    classDef firmware fill:#e3f2fd,stroke:#1976d2,stroke-width:2px
    classDef system fill:#e8f5e9,stroke:#4caf50,stroke-width:2px
    class A,B,C firmware
    class NVR system
All firmware is designed as upstream capture endpoints for MiBeeNvr: cameras handle video capture, MiBeeNvr handles unified storage and management.
MiBeeCam — ESP32-S3-A10 Solution
GitHub · MIT License
This is the most successful solution. ESP32-S3-A10 dev board + OV2640 camera (8225N module), 16MB Flash, ESP-IDF v5.4.3 development. Features include MJPEG stream, frame-differencing motion detection, Web config interface, Prometheus metrics. Having an LCD screen makes debugging much easier.
AI Thinker ESP32-CAM — Classic Solution
GitHub · MIT License
Entry-level choice, AI Thinker ESP32-CAM dev boards are widely available for around $10-15. 4MB Flash + 4MB PSRAM, runs MJPEG stream without issues. Highlights include SD card storage and NAS upload (WebDAV/HTTP), plus adaptive dark scene detection — automatically switches to infrared mode at night. Downside: no screen, 4MB Flash is limited.
MiBeeHomeCam — XIAO ESP32-S3 Sense
GitHub · GPL v3.0
The most advanced solution. XIAO ESP32-S3 Sense board is compact and refined, with dual camera support (OV2640/OV3660), 8MB Octal PSRAM. Highlights include AVI segmented recording (real video recording, not just snapshots), FTP/WebDAV dual-protocol upload, watchdog anti-freeze, chip temperature monitoring, batch file management. Suitable for long-term stable operation.
Selection Guide
- Beginners: Choose AI Thinker ESP32-CAM — cheap with plenty of resources
- Daily use: Choose MiBeeCam — LCD screen makes debugging convenient
- Maximum features: Choose XIAO ESP32-S3 Sense — most powerful
System Service Configuration
For stable operation, I use systemd to manage MiBeeNvr:
| |
Save to /etc/systemd/system/mibee-nvr.service, then systemctl enable --now mibee-nvr. Auto-start on boot, auto-restart on failure.
Open Source
MiBeeNvr is open source, stars and contributions welcome:
- MiBeeNvr: https://github.com/Mi-Bee-Studio/MiBeeNvr (MIT License)
- MiBeeCam: https://github.com/Mi-Bee-Studio/luatos-esp32s3-a10-camera (MIT)
- AI Thinker ESP32-CAM: https://github.com/Mi-Bee-Studio/ai-thinker-esp32-cam (MIT)
- MiBeeHomeCam: https://github.com/Mi-Bee-Studio/seeed-esp32s3-cam (GPL v3.0)
Documentation is comprehensive, with detailed deployment and configuration instructions.
Closing Thoughts
To be honest, I built this project mainly because I was dissatisfied with all the existing solutions. Cloud storage is too expensive, open-source solutions are too heavy, and commercial products are too closed. Building my own was just right: lightweight, free, and fully under my control.
Oh, about the name MiBeeNvr — “Mi” stands for me (Mickey), “Bee” stands for… classified, and “Nvr” is naturally Network Video Recorder. Simple, memorable, and a bit meaningful.
If you also have home camera needs or ideas about NVR systems, feel free to reach out. Issues are welcome on GitHub.