MiBeeNvr v0.2.0 Update: Docker Deployment, HLS Streaming, Recording Merging, and a Complete Installation Guide
The previous article introduced MiBeeNvr’s basic features and design philosophy. It’s only been a week since v0.1.0, and v0.2.0 follows right behind. This update is substantial — 15 new features, some I needed myself, others from community feedback.
This article covers three things: what’s new in v0.2.0, how to deploy from scratch, and some practical tips for real-world use.
v0.2.0 New Features Overview
This update has a lot of content. Here’s a breakdown by category:
Deployment Related
- Docker container image (AMD64 + ARM64), published to GHCR
- One-click install script
curl | bash - Auto-initialization + setup mode, no config file needed on first boot
mibee-nvr initinteractive configuration commandmibee-nvr healthhealth check
Recording and Storage
- H.265 full pipeline support (recording + HLS streaming)
- HTTP JPEG camera integration (ESP32-CAM direct connection)
- Automatic recording segment merging, reducing fragmented files
- Per-camera independent retention days
- Plain text passwords auto-converted to bcrypt hash
Streaming and Protocols
- HLS on-demand live streaming (H.264 / H.265)
- Sub-stream fallback (auto-downgrade when bandwidth is limited)
- ONVIF device discovery (backend framework in place)
Web Interface
- Chart.js statistics dashboard (storage trends + per-camera stats)
- Auto-detect dark/light theme
- Chinese/English language switching
- Responsive layout (mobile + desktop)
- Merge progress monitoring panel
- WebDAV read-write mode
Let’s dive into a few key features.
Docker Support
This was probably a necessary feature. v0.1.0 only offered binary downloads — fine for experienced users, but many folks prefer the Docker approach. v0.2.0 provides official container images supporting AMD64 and ARM64, published on GitHub Container Registry.
The key feature: auto-initialization on first boot. No configuration file needed upfront — the container generates a default config and enters “setup mode,” where all APIs don’t require authentication, making it easy to complete initial configuration through the Web interface.
HLS Live Streaming
Previously you could only watch recordings, not live footage. v0.2.0 adds HLS live streaming support for both H.264 and H.265 codecs. In the Web UI, just click to view — no additional player needed.
Technically it uses gohlslib to generate HLS streams on-demand — started when a client requests it, auto-released when nobody is watching. It also uses async frame writing to decouple the HLS stream from the recording pipeline, so they don’t interfere with each other.
Another practical feature: sub-stream fallback. If the main stream consumes too much bandwidth, you can configure a lower-resolution sub-stream address, and the system auto-switches when bandwidth is limited.
HTTP JPEG Cameras
v0.1.0 only supported RTSP protocol cameras. v0.2.0 adds HTTP JPEG support, meaning ESP32-CAM and similar devices that output MJPEG streams can connect directly without needing RTSP conversion.
The Web UI uses Canvas to implement an MJPEG frame player, which is noticeably smoother than displaying JPEG images directly.
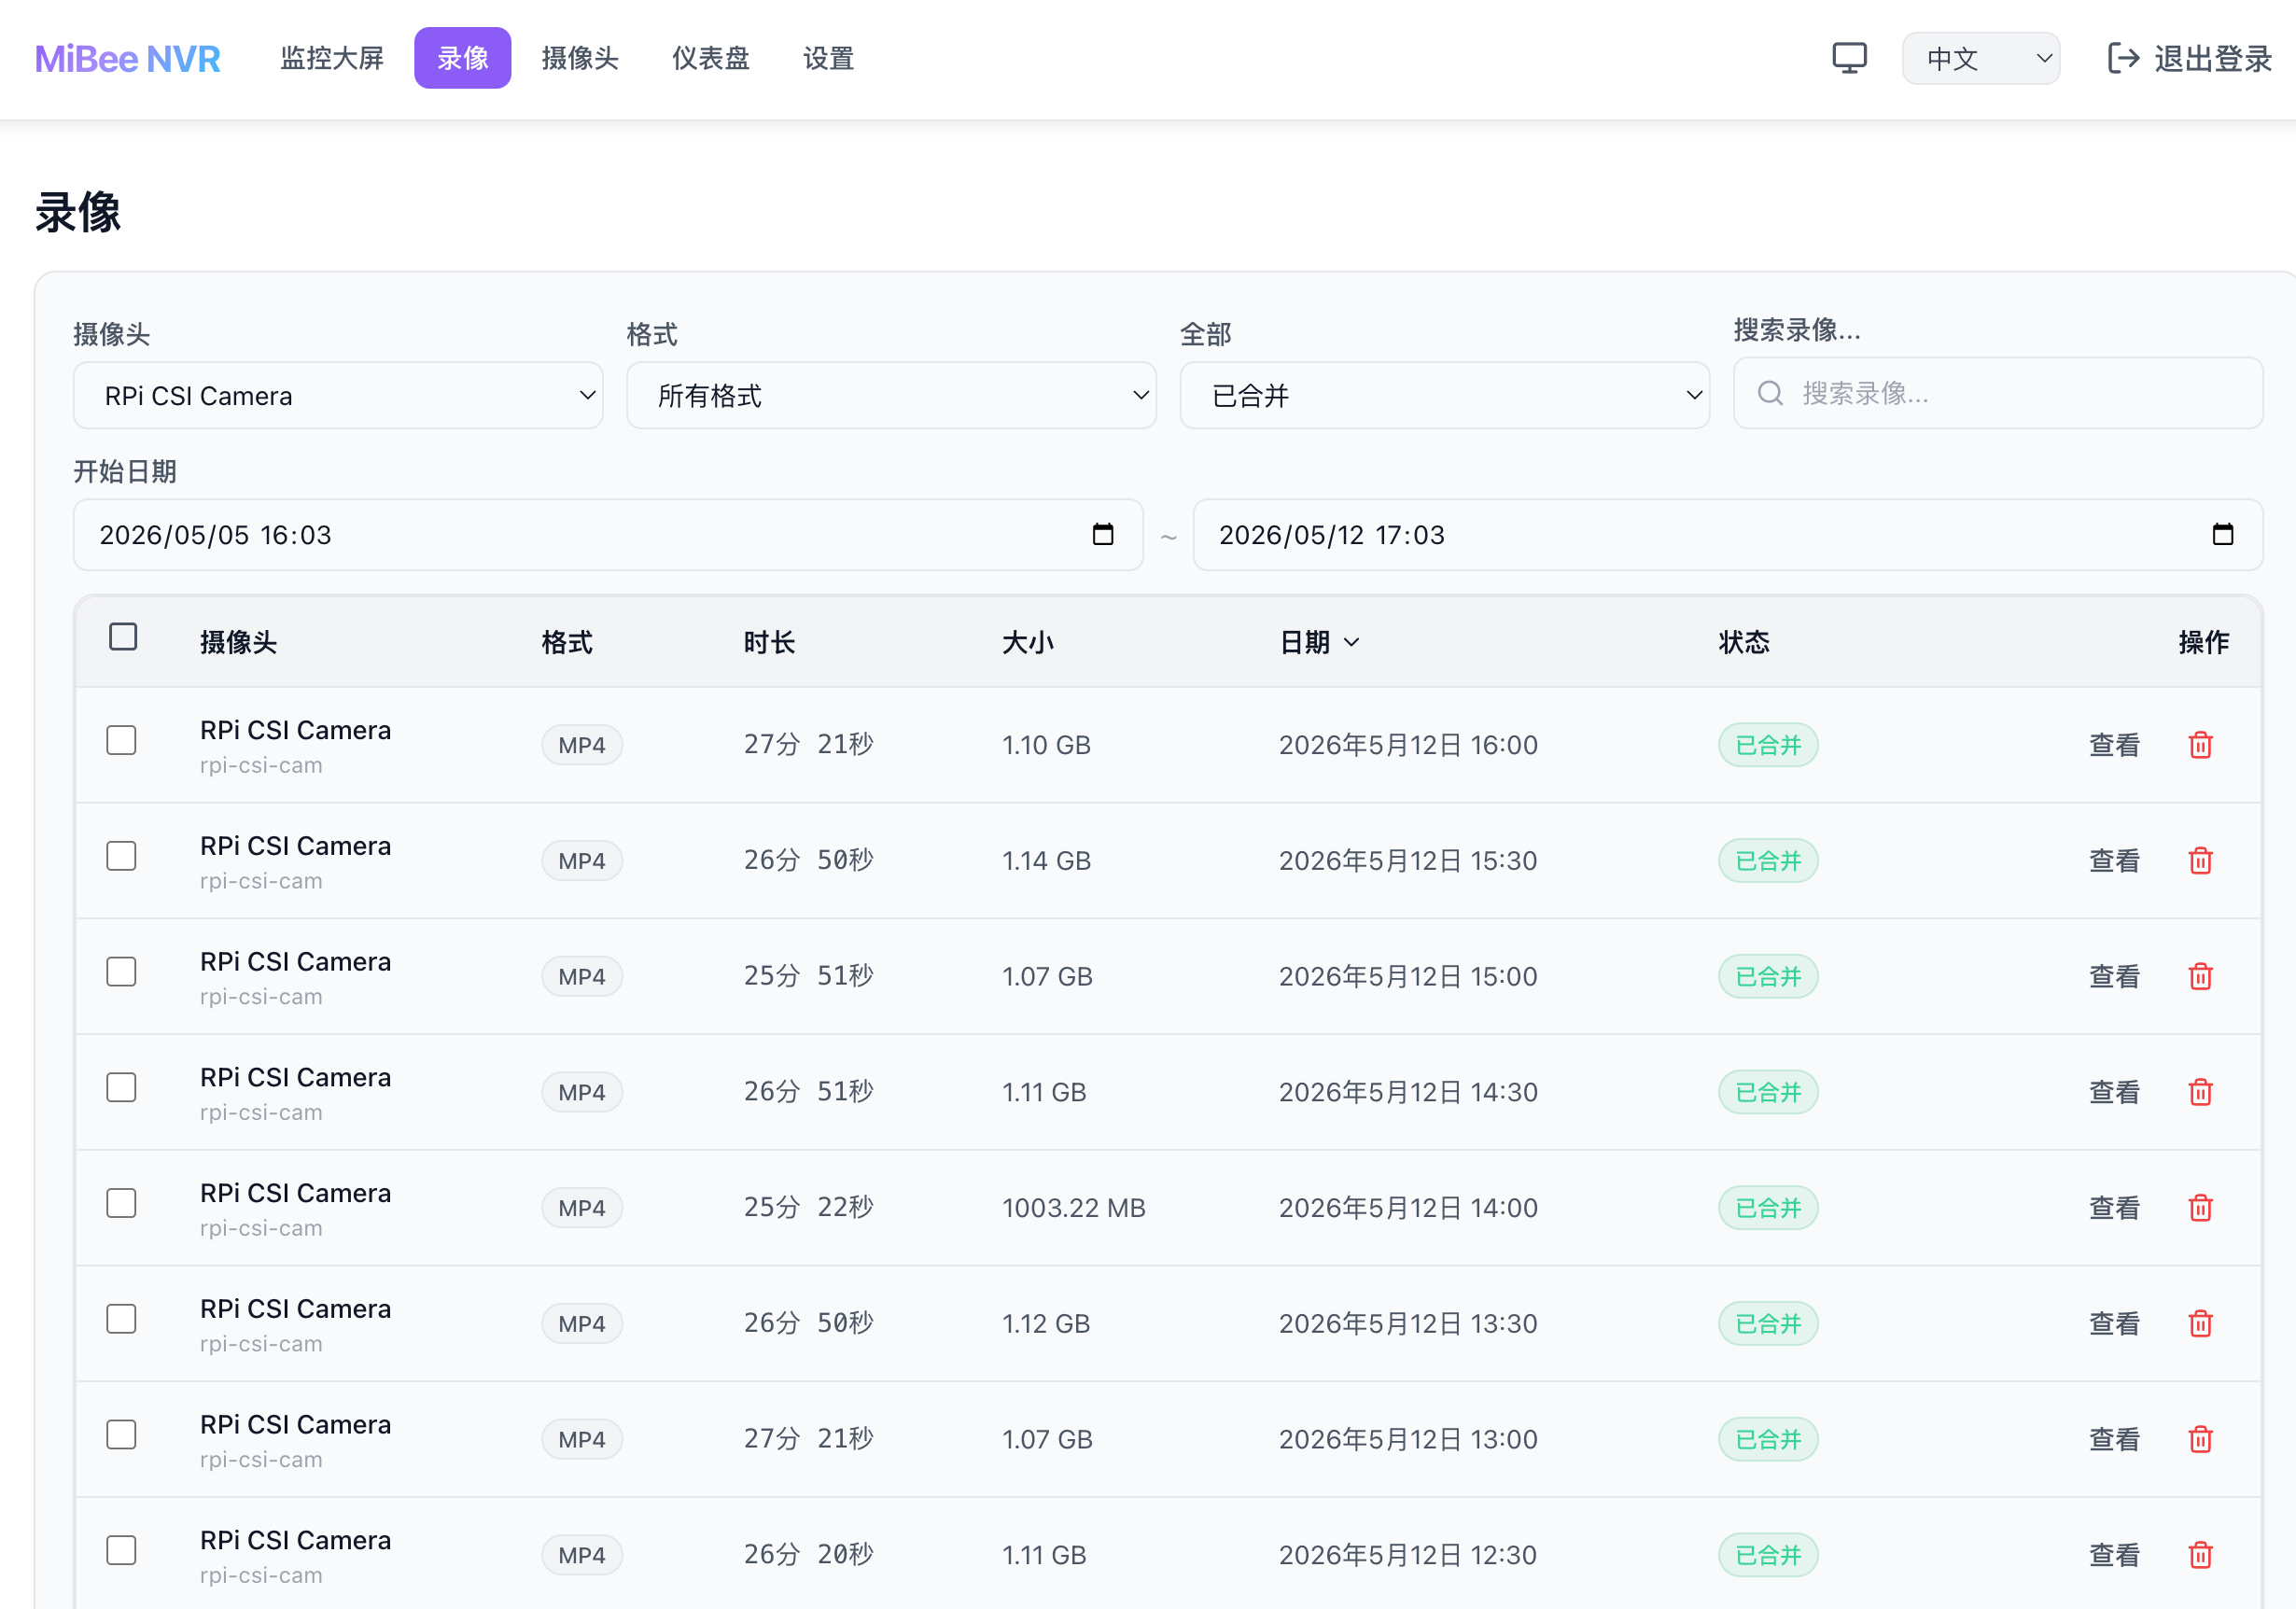
Recording Segment Merging
With 30-second segment files, one camera generates 2,880 files per day. Too many files become inconvenient to manage and slow down database queries. v0.2.0 adds automatic merge functionality: periodically merging small segment files within the same time window for the same camera into larger MP4 files.
The merge policy can be configured globally or per-camera. The Web UI also has a merge progress monitoring panel.
Per-Camera Independent Retention Policy
Previously all cameras shared the same retention period. But in practice, different cameras have vastly different recording importance. Doorway footage might need 30 days retention, while a balcony camera only needs 7 days. v0.2.0 supports setting independent retention_days for each camera.
Installation Guide
This section is the main focus — detailed instructions for various deployment methods. From simplest to most flexible, choose what fits.
Deployment Method Comparison
flowchart TB
    D1@{shape: diam, label: "Choose deployment method"} --> D2@{shape: diam, label: "Has Docker"} --> C@{shape: rect, label: "Docker deployment<br/>Most convenient"}
    D2 --> D3@{shape: diam, label: "Linux bare metal"} --> D@{shape: rect, label: "One-click script<br/>Fastest"}
    D3 --> D4@{shape: diam, label: "Want full control"} --> E@{shape: rect, label: "Manual download<br/>Most flexible"}
    D4 --> F@{shape: rect, label: "Source build<br/>Most hardcore"}

    classDef decision fill:#fff3e0,stroke:#ff9800,stroke-width:2px
    classDef method fill:#e3f2fd,stroke:#1976d2,stroke-width:2px
    class D1,D2,D3,D4 decision
    class C,D,E,F method
Method 1: Docker Deployment (Recommended for Beginners)
If you already have Docker installed, this is the most convenient approach. Two commands and you’re done.
The simplest way to run — no configuration file needed upfront:
| |
On first boot, it auto-generates a default config and enters setup mode. Open your browser to http://your-ip:9090 — no password needed.
To set an initial password directly:
| |
Using docker-compose is also straightforward. First create the directory structure:
| |
Then write a docker-compose.yml:
| |
Then:
| |
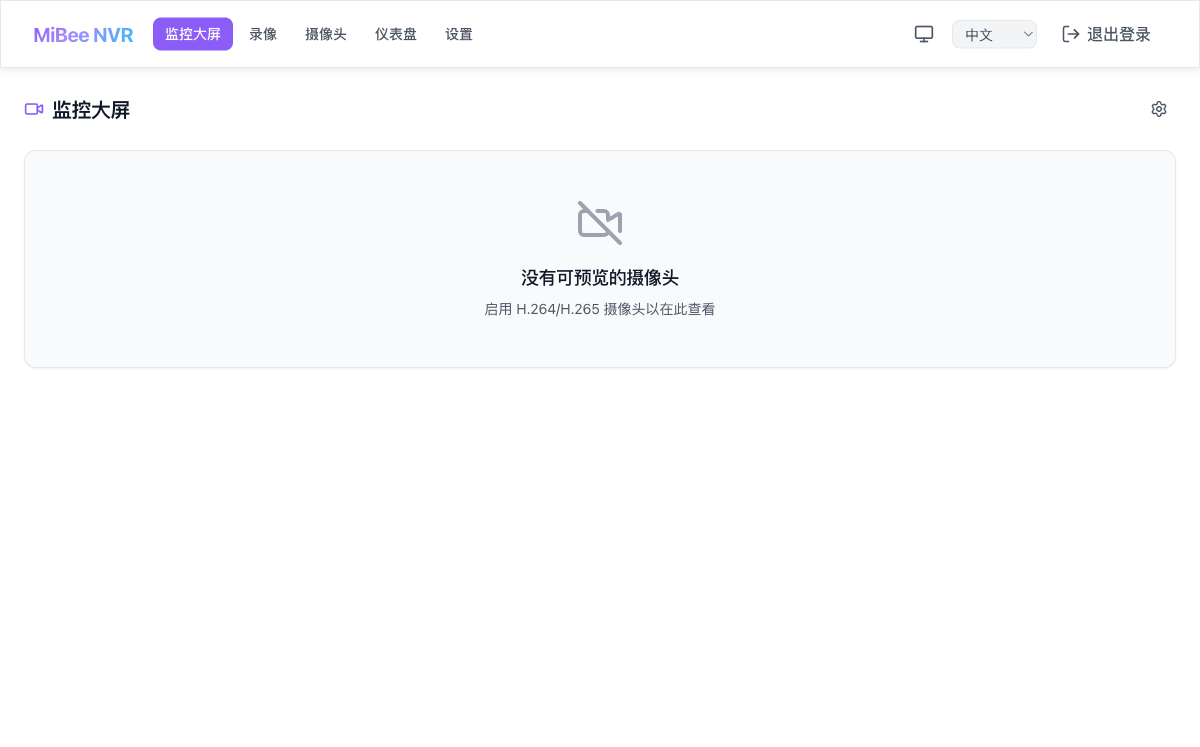
This is what it looks like right after installation — no data yet. Time to add cameras.
A few notes:
- Recording data is stored in the container’s
/datadirectory — make sure to mount it to the host, or data will be lost if the container is recreated - FTP port (2121) and passive mode ports (2122-2140) are optional — skip if you don’t need FTP
- ARM64 devices (Raspberry Pi, etc.) pull the same image tag — Docker auto-selects the correct architecture
- Built-in health check command, works with
docker psto show container status
Method 2: One-Click Install Script (Linux Bare Metal)
For Linux machines without Docker, this is the fastest way:
| |
The script automatically completes the following steps:
- Detects system architecture (AMD64 / ARM64)
- Downloads the latest binary from GitHub Releases
- Creates a
nvrsystem user (security — won’t run as root) - Prompts for admin password
- Generates configuration in
/var/lib/mibee-nvr/ - Installs systemd service and starts it
After installation, just visit http://your-ip:9090.
Install a specific version:
| |
Uninstall (won’t delete recording data):
| |
Method 3: Manual Binary Download
For those who want full control, manual download works too. Go to GitHub Releases and download the binary for your architecture.
| |
Initialize configuration:
| |
The init command’s full parameters:
| Parameter | Default | Description |
|---|---|---|
--password | Interactive input | Admin password |
--username | admin | Admin username |
--data-dir | /var/lib/mibee-nvr | Data storage directory |
--listen | :9090 | Listen address and port |
--config | mibee-nvr.yaml | Config file path |
--force | false | Overwrite existing config |
Start:
| |
For stable background operation, set up a systemd service. Create /etc/systemd/system/mibee-nvr.service:
| |
Then:
| |
Method 4: Build from Source
If GitHub access from China is slow, use Gitee:
| |
Building requires Go 1.26+ and Node.js (for frontend build). The output is a single binary file in the current directory.
Cross-compile for ARM64 (building on x86 for ARM devices):
| |
First-Time Configuration
Regardless of installation method, open a browser to http://your-ip:9090 and you’ll see the login page:
v0.2.0 adds auto dark/light theme detection that follows system settings. Language switching between Chinese and English is also supported.
Log in with the credentials you set during initialization.
Adding Cameras
After logging in, navigate to the camera management page:
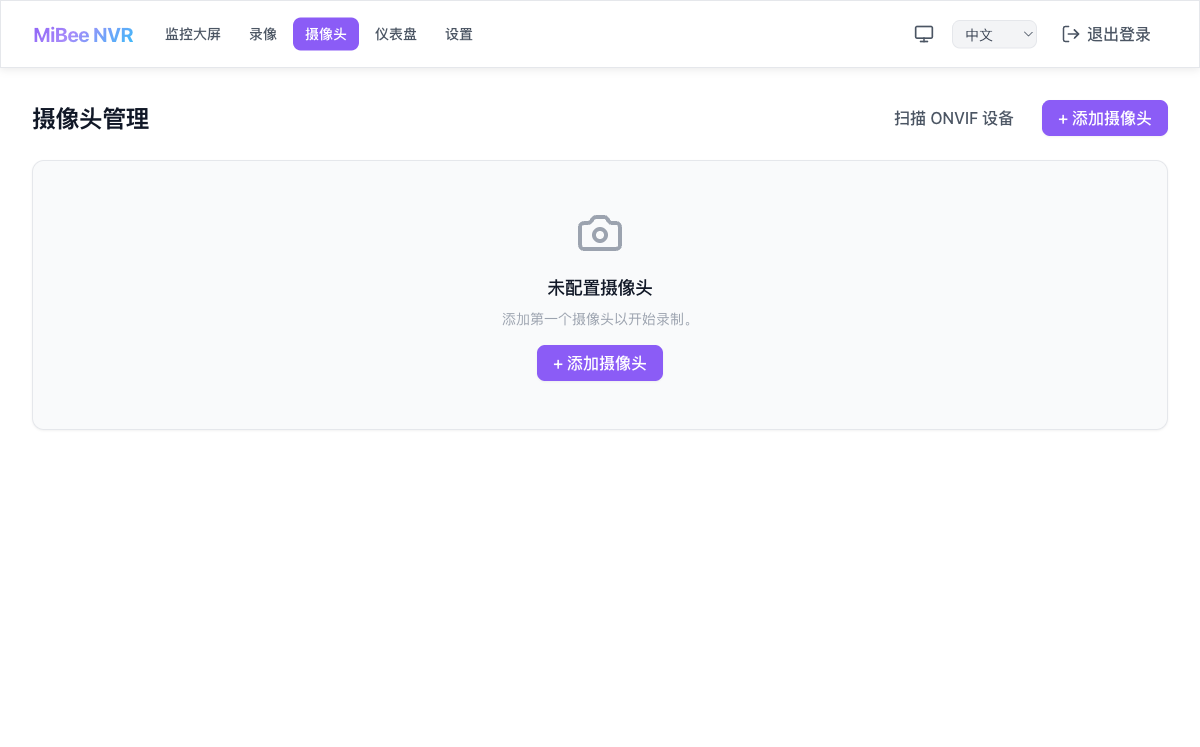
This is what a fresh install looks like — no cameras added yet. Click “Add Camera” and fill in the following:
- ID: Unique camera identifier, lowercase with hyphens, e.g.,
front-door - Name: Display name, Chinese works too
- Protocol:
rtsp,http, oronvif - Encoding:
h264,h265,mjpeg, orjpeg - URL: Video stream address
- Enabled: Whether to start recording immediately
v0.2.0 splits protocol and encoding into two independent fields, more flexible than v0.1.0’s rtsp_h264 approach.
Example configurations for common cameras:
| |
After adding cameras, the system automatically starts recording. The camera list shows each camera’s online status and last active time:

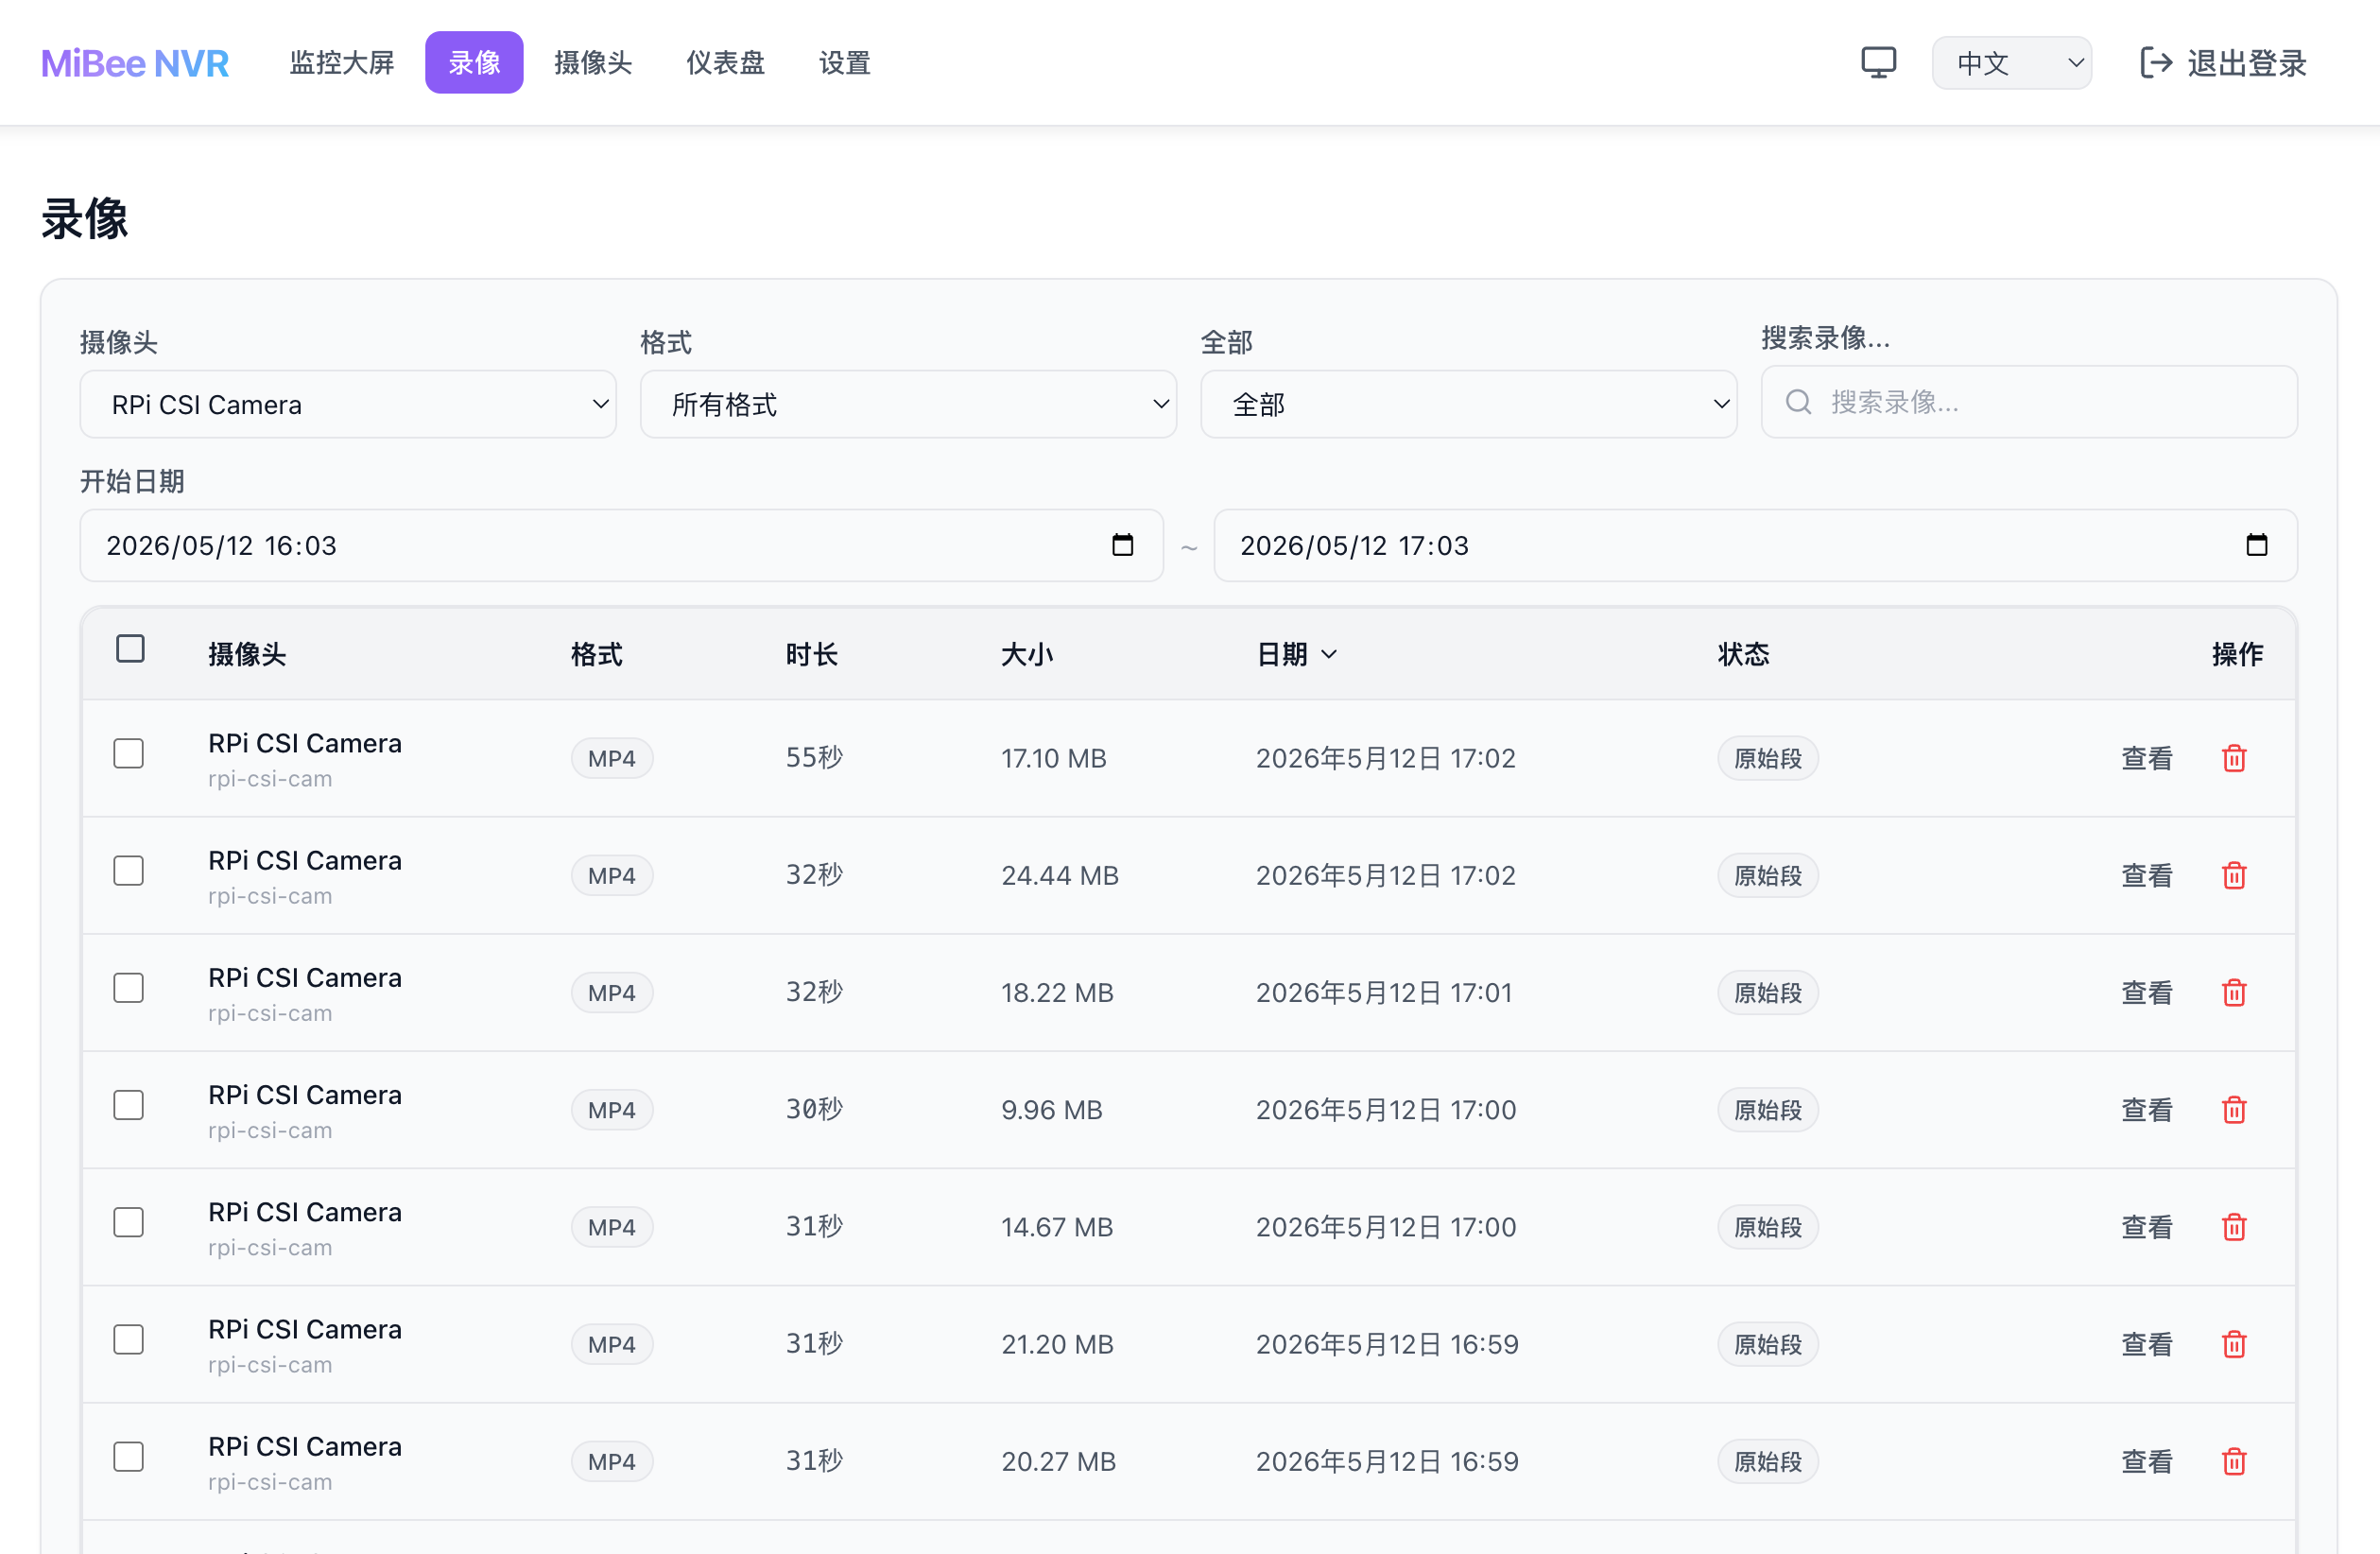
Recording Management
Recordings are automatically segmented by time, default 30 seconds per segment. The recording list page supports filtering by camera and time:
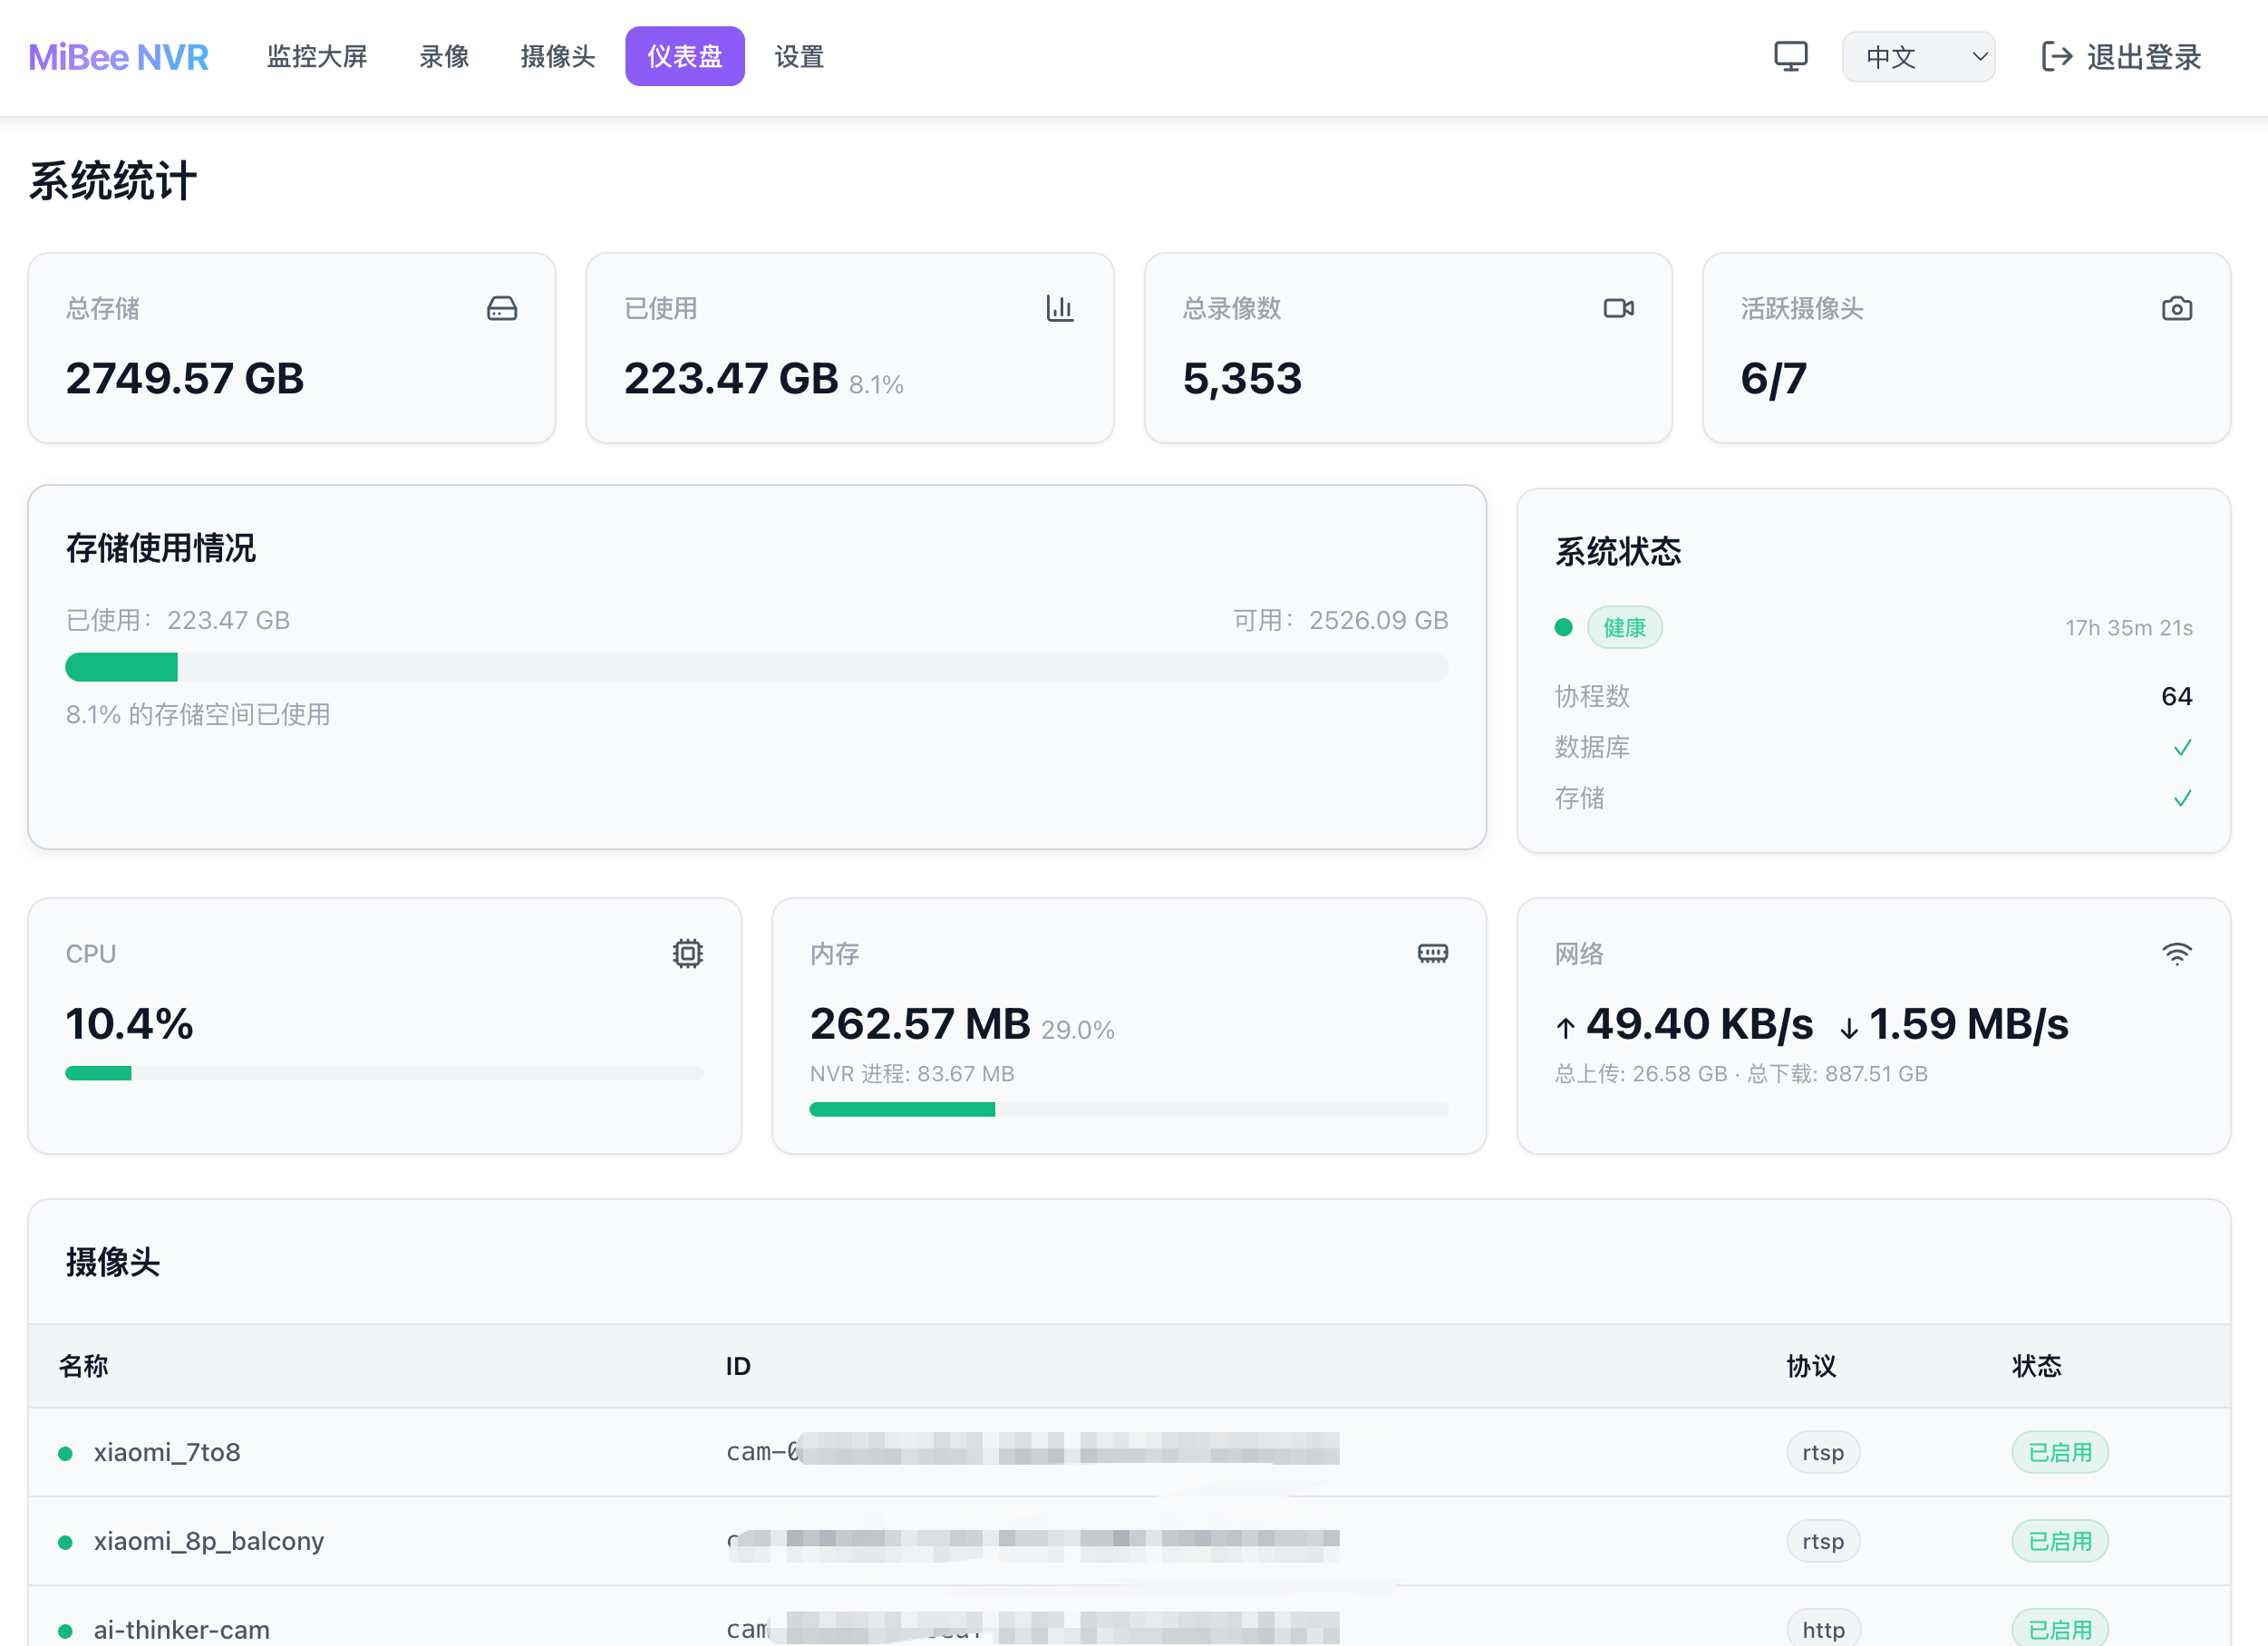
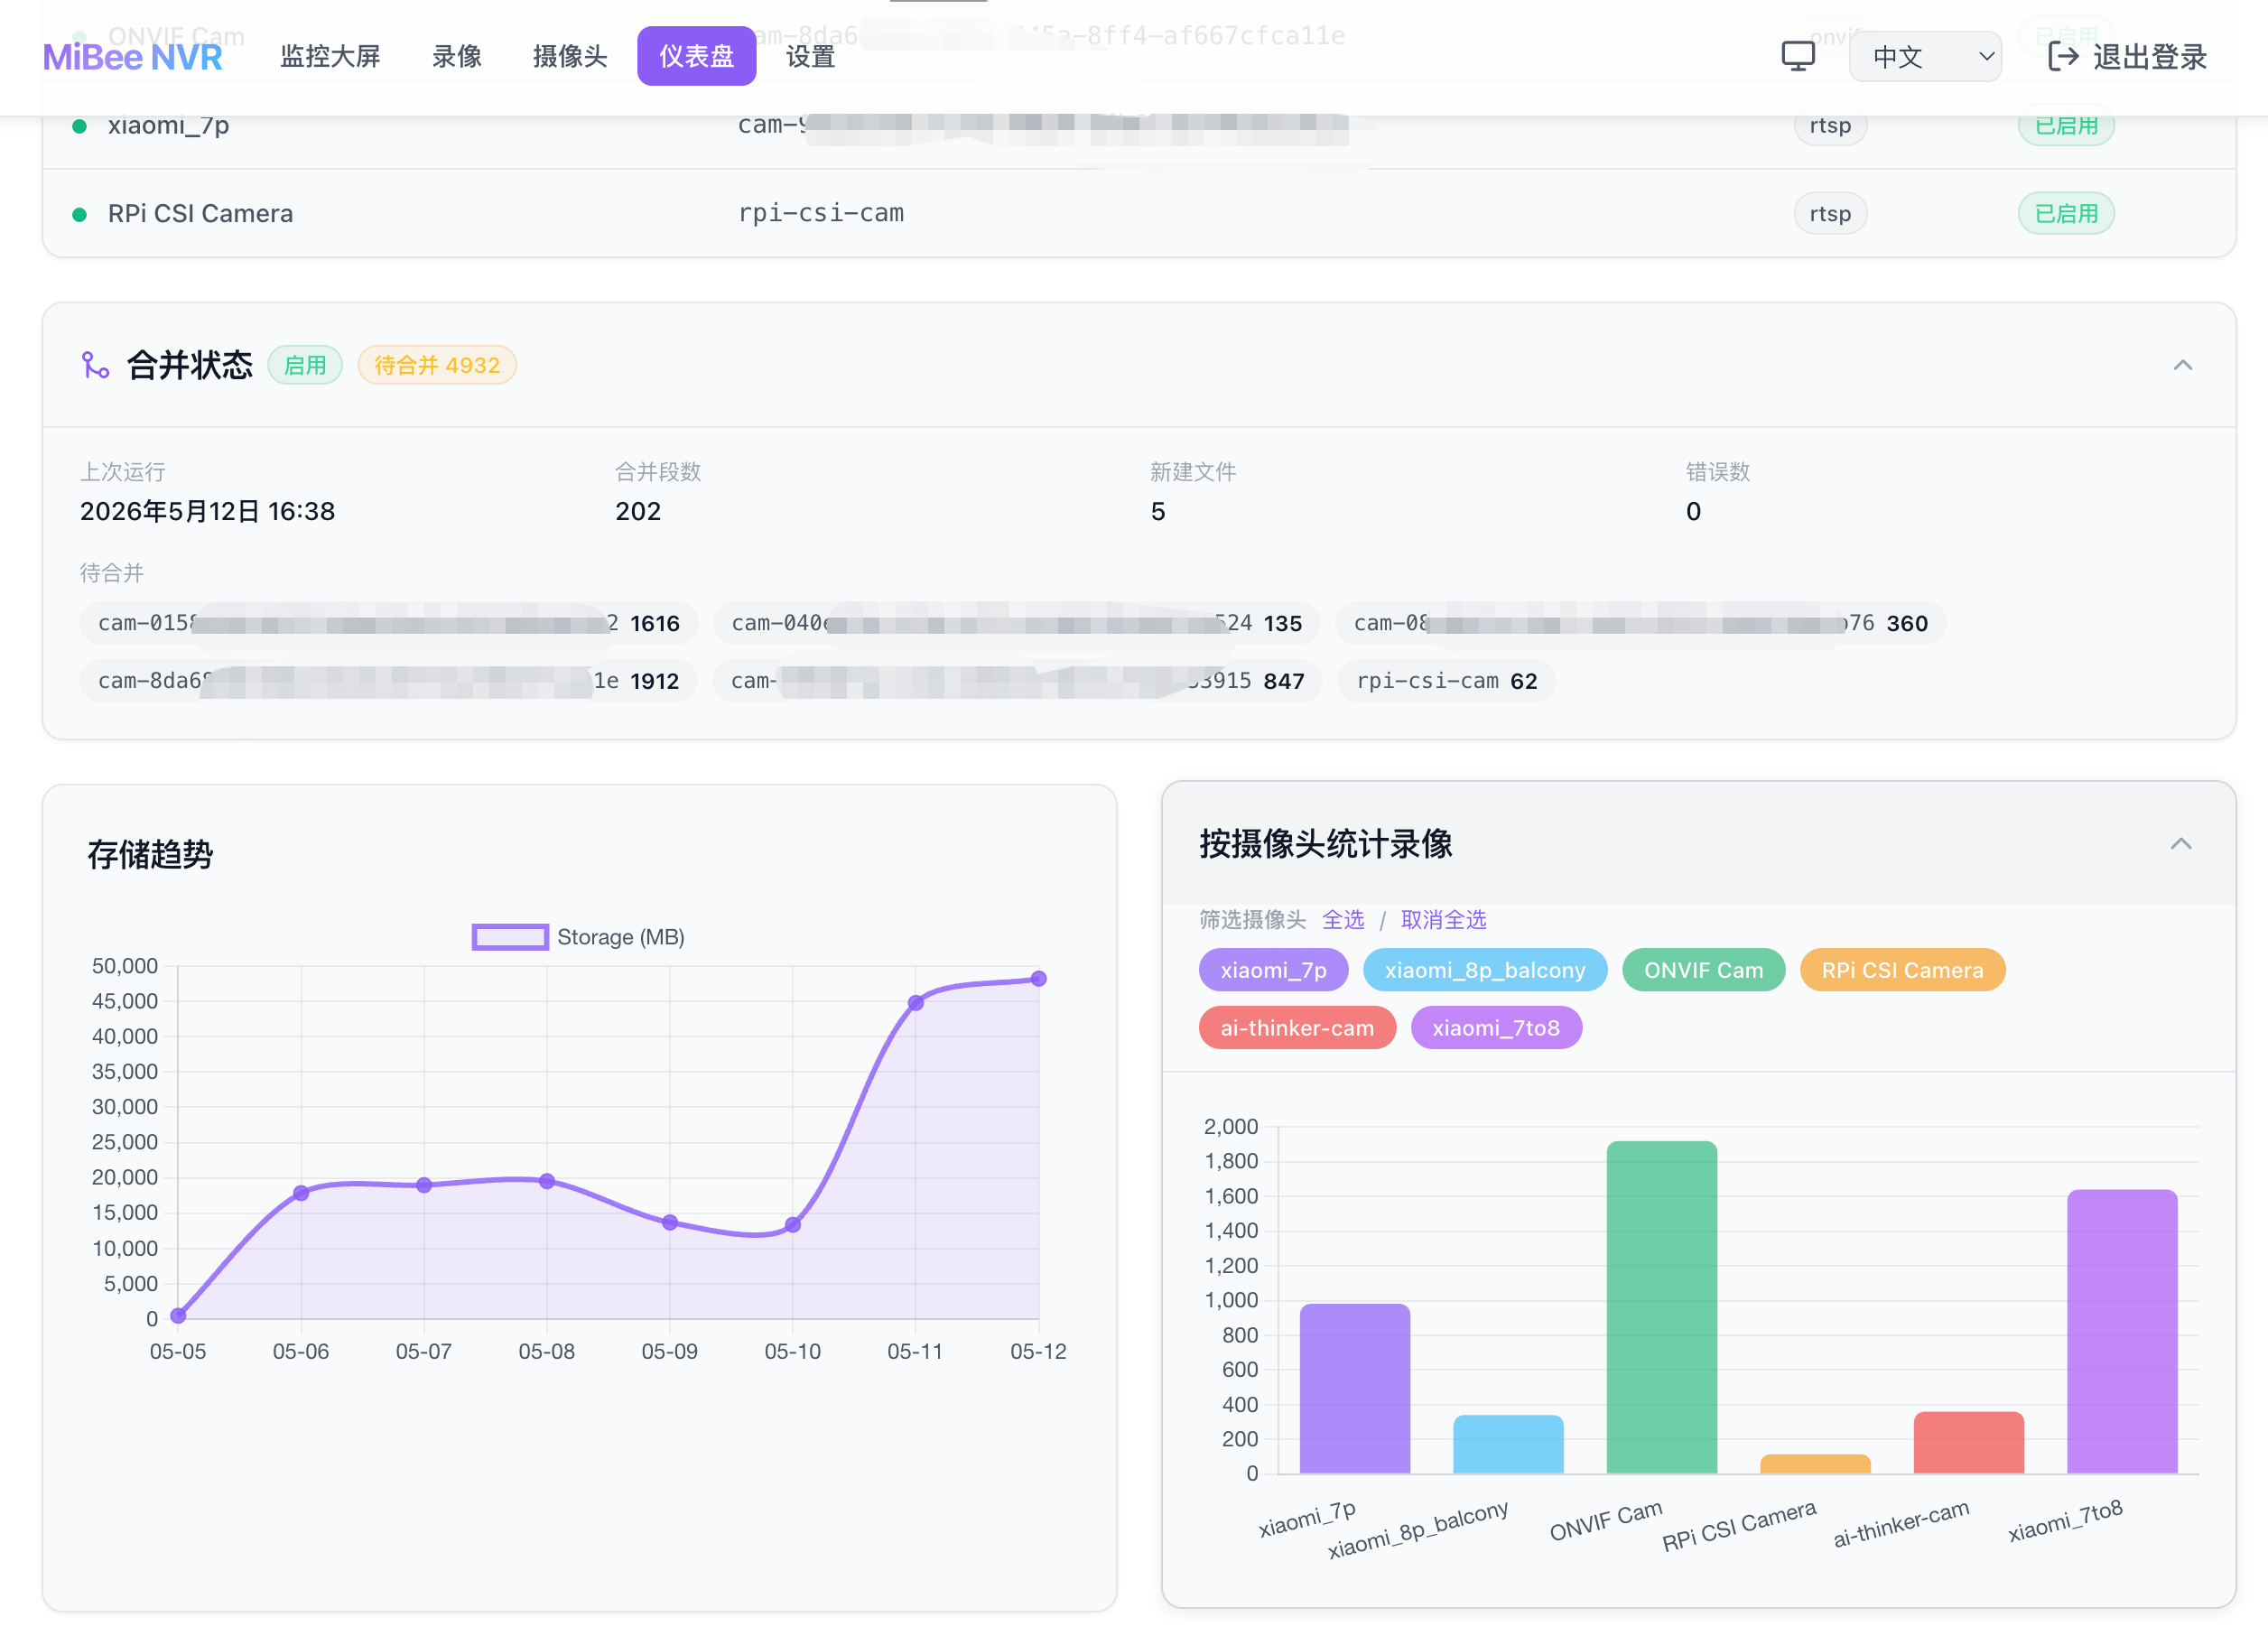
Statistics Dashboard
v0.2.0 adds Chart.js-powered statistics showing storage trends and per-camera recording volume. Supports time range filtering and individual toggling of camera statistics lines:
Settings Page
All configuration can be modified through the Web UI without manually editing YAML files:
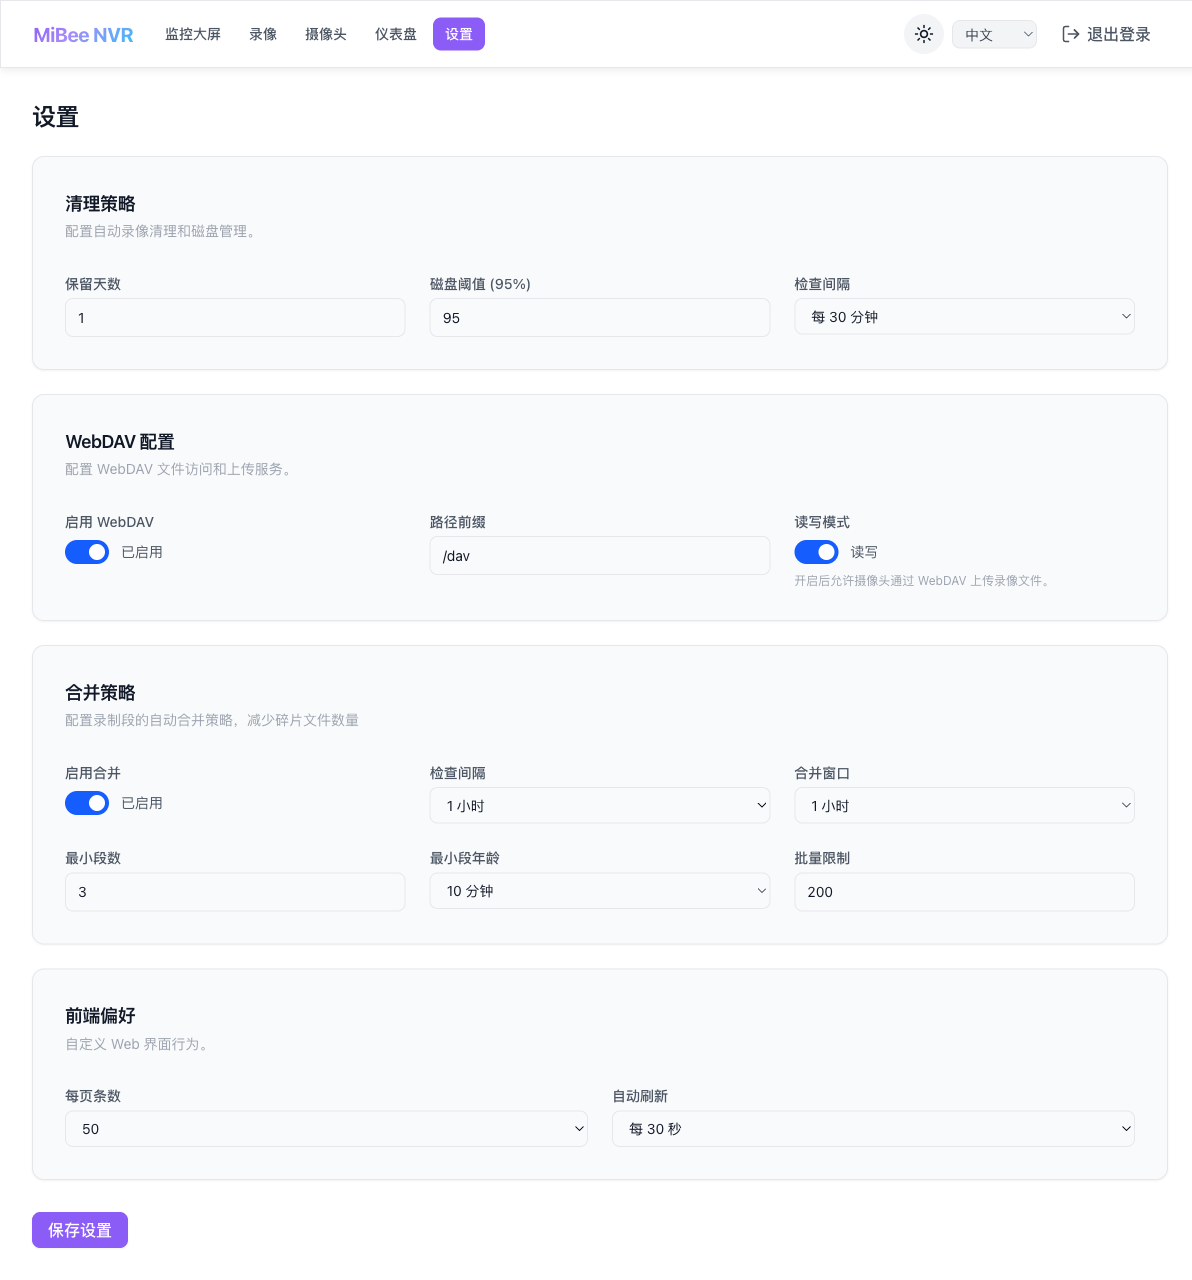
Main configuration items:
- Cleanup Policy: Retention days, disk threshold, check interval
- WebDAV: Enable, path prefix, read-write mode
- Merge Policy: Enable, merge window, minimum segments, batch limit
- Frontend Preferences: Items per page, auto-refresh interval
A note on merge policy: if enabled, the system periodically merges small segment files from the same camera into larger ones. For example, with 30-second segments and a 1-hour merge window, 120 small files are combined into one 1-hour file. This drastically reduces file count, making management and queries faster.
v0.2.0 Complete Data Flow
The updated system architecture has much more than v0.1.0:
graph TB
    subgraph Cameras
        CAM1@{shape: hex, label: "RTSP Camera H.264/H.265"}
        CAM2@{shape: hex, label: "HTTP Camera MJPEG/JPEG"}
        CAM3@{shape: hex, label: "ONVIF Device"}
    end

    subgraph Recorders
        RTSP_R["RTSP Recorder"]
        HTTP_R["HTTP Recorder"]
    end

    subgraph Storage
        SEG["MP4 Segment 30s"]
        DB@{shape: cyl, label: "SQLite Metadata"}
        MERGE["Merge Engine"]
        CLEAN["Cleanup Engine"]
    end

    subgraph Network
        HLS["HLS Live"]
        API["REST API"]
        UI["Web UI"]
        WEB["Web Browser"]
        DAV["WebDAV"]
        FTP["FTP"]
        MQTT["MQTT Trigger"]
        PROM["Prometheus"]
    end

    CAM1 --> RTSP_R
    CAM2 --> HTTP_R
    CAM3 --> API

    RTSP_R --> SEG
    HTTP_R --> SEG
    SEG --> DB
    SEG --> MERGE
    SEG --> CLEAN
    RTSP_R -->|"Frame Branch"| HLS
    API --> UI
    HLS --> UI
    API --> WEB
    API --> DAV
    API --> FTP
    API --> MQTT
    API --> PROM

    classDef hardware fill:#e3f2fd,stroke:#1976d2,stroke-width:2px
    classDef process fill:#e8f5e9,stroke:#4caf50,stroke-width:2px
    classDef storage fill:#fff3e0,stroke:#ff9800,stroke-width:2px
    classDef network fill:#f3e5f5,stroke:#9c27b0,stroke-width:2px
    class CAM1,CAM2,CAM3 hardware
    class RTSP_R,HTTP_R,MERGE,CLEAN process
    class SEG,DB storage
    class HLS,API,UI,WEB,DAV,FTP,MQTT,PROM network
Compared to v0.1.0, the main changes:
- Recording engine expanded from single RTSP to multi-engine (RTSP + HTTP JPEG)
- HLS streaming achieved through frame branching — recording and streaming don’t interfere
- Merge engine added as a storage-layer post-processing step
- Cleanup engine now supports per-camera independent policies
- ONVIF module framework is in place, frontend UI ready, waiting for backend library integration
Practical Deployment Tips
After running for a while, here are some practical suggestions:
Hardware Selection
MiBeeNvr itself has minimal resource usage. The main bottlenecks are video decoding and storage. Suggested configurations:
| Camera Count | Minimum | Recommended |
|---|---|---|
| 1-2 | 512MB RAM, 2GB storage | 1GB RAM, 16GB storage |
| 3-4 | 1GB RAM, 8GB storage | 2GB RAM, 32GB storage |
| 5+ | 2GB RAM, 16GB storage | 4GB RAM, 64GB+ storage |
Segment duration has a significant impact on memory: 30-second segments use ~15-20MB per stream, 60 seconds doubles it. Devices with limited memory should stick with the default 30 seconds.
Storage Planning
Recording files are stored in a data-dir/camera-id/date/ directory structure. For example:
| |
With merging enabled, merged files replace the original segments:
| |
Network Configuration
For external access, it’s recommended to add a reverse proxy (Nginx / Caddy) with HTTPS in front. MiBeeNvr doesn’t support HTTPS natively, but it’s better to let a dedicated reverse proxy handle that.
Changelog
v0.2.0 complete update list:
Docker and Deployment
- Official Docker container image, dual architecture (AMD64 + ARM64), published to GHCR
- docker-compose.yml one-click deployment
- Auto-initialization, no config file needed on first boot
- Setup mode (no authentication when no password set)
- One-click install script
curl | bash - Built-in Docker HEALTHCHECK
- GitHub Actions CI/CD auto-build and release
Recording and Media
- Auto-segment merging, supports global and per-camera configuration
- HTTP JPEG camera recording (MJPEG stream)
- Per-camera independent retention days (
retention_days) - Protocol and encoding fields independently configurable (
rtsp+h265,http+jpeg)
Streaming and ONVIF
- HLS live streaming (H.264 / H.265), on-demand generation
- Sub-stream fallback, auto-downgrade when bandwidth limited
- ONVIF device discovery (backend framework in place)
Web UI
- Dark/light theme, auto-detect system preference
- Chart.js statistics dashboard (storage trends, per-camera stats)
- Chinese/English language switching
- Responsive layout (mobile and desktop)
- Merge progress monitoring panel
Operations Tools
mibee-nvr initinteractive initializationmibee-nvr healthhealth check command- Plain text password auto-converted to bcrypt hash
Open Source
The project is continuously updated. Stars and feedback welcome:
- MiBeeNvr: https://github.com/Mi-Bee-Studio/MiBeeNvr (MIT License)
- China mirror: https://gitee.com/Mi-Bee-Studio/MiBeeNvr